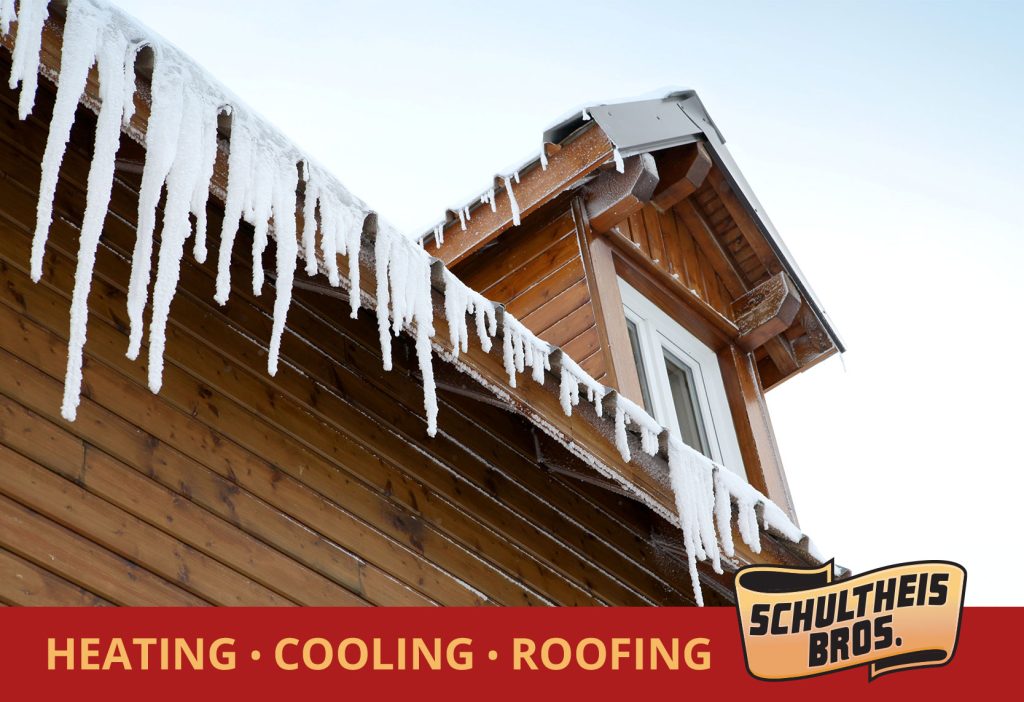
Icicles hanging along the eaves of your house may look stunning, but they are more likely to spell trouble. That’s because the same circumstances that allow icicles to form – snow-covered roofs and freezing weather – also cause ice dams, thick ridges of solid ice that build up along the eaves.
Ice dams are more than just a curious phenomenon. Severe ice dams can weigh hundreds of pounds, compromising the structure of the roof eaves. More critically, ice dams can lead to meltwater backing up under the shingles, where it can flow down and ruin ceiling and wall surfaces. If ignored, ice dams can cause serious damage to your roof, gutters, paint, insulation and interior drywall, as well as other surfaces.
Seeing as your roof is your home’s initial line of defense against the elements, it’s essential that you keep a watchful eye and be sure it’s in good shape, particularly during the winter months. The leading problem with ice dams is that they can be tricky. When hidden under a thick blanket of snow, they can be difficult if not impossible to spot, and the damage can be done right under your nose.
To prevent this from happening, it’s vital to understand the basics of ice dams. The good news is we’re going to go over what you need to know, beginning with what ice dams are, how they are formed, how to remove them and how to prevent them in the future.
Let’s dive in!
What exactly is an ice dam?
An ice dam is a blockage of ice that takes shape on the edge of a roof. They actually construct a dam that keeps ice and snowmelt from flowing as it should through your gutters and out your downspouts. If you detect sizeable icicles forming on the corners of your house or gutters, that’s a telling sign you have ice dams forming on your roof. This dam will only continue to grow as more melted snow works its way down the roof.
Eventually, the dam will get so enormous that instead of the water freezing and becoming part of the dam, it will become trapped behind the dam. This dammed water will sooner or later find its way through cracks in the roof and flow into your home.
What causes ice dams?
Keep in mind that an ice dam results from snow that melts and then re-freezes. And the culprit is an abnormally warm roof. That’s because the ice melts on an upper, warmer part of the roof, then flows down to the colder eave overhang, where it re-freezes. As the ice mounts up, it creates a blockage that puts a stop to additional snowmelt from flowing off the roof. The ice now begins to back up beneath the roof shingles, where it melts once again, soaking the roof sheathing and leaking into the attic. There, it saturates the insulation, making it much less effective. From here, it may very well leak through the ceiling drywall below and into your living space. Along with the interior water damage, large ice dams can be quite heavy and can damage gutters and eventually present a safety hazard to people below.
Non-uniform roof surface temperatures actually lead to ice dams.
Ice dams are created only when the space inside an attic along the underside of the roof deck is above the freezing point. As the house’s warm air under the roof heats the shingles and melts the snow on the roof, the water flows down the roofline until it reaches the overhanging eave assembly and re-freezes.
Ice dams usually begin or become worse following a heavy snowfall due to the snow’s insulating properties. That’s because the snow layer traps warm air from the house beneath the snow which causes it to melt.
What problems can ice dams cause?
We’ve briefly mentioned the potential damage that can result from ice dams. Here, then, is a summary of these would-be damages.
- The ice dam’s weight alone can tear down gutters, shingles and downspouts which can damage your home and make repairs more difficult and costly.
- Ice and snow will back up behind the dam, and when it melts can lead to water leaking into your attic, since it can’t flow off the roof via your clogged gutter.
- The snow back-up can also leak through your chimneys, skylights or other sensitive areas on your roof.
- The water leaks into your attic and walls of your home can lead to mold and mildew growth, which can trigger respiratory issues and damage your home’s interior.
- Hefty snow and ice could also result in roof collapse.
How to rid of ice dams fast
Hacking away at ice dams with a hammer, chisel or shovel is not only bad for your roofing, it can be dangerous for you. And throwing salt on them will do more to harm the shingles than to the ice. Short of praying for warmer weather, here are some stop-gap measures.
Blow in cold air
Take a box fan into the attic and aim it at the underside of the roof where water is actively leaking in. This directed amount of cold air will freeze the water in its tracks. Says one roofing contractor, “You’ll stop the leak in a matter of minutes.”
Rake it
If possible, rake the snow off your roof after a heavy snowfall. A snow rake, an aluminum scraper attached to a telescoping aluminum pole, is the simplest answer for those intermittent heavy snowfalls. If you pull the snow down, it can’t melt and form an ice dam. It’s a useful, if tiresome, solution, but only for single-story homes. You can’t reach the second-floor roof without some hitches. And never use a snow rake when standing on a ladder! Moreover, you have to take care not to break shingles, which are brittle in colder weather. Most home centers and hardware stores carry or can order snow rakes. Plan to purchase one before the snow comes; demand goes up after the first heavy snowfall of the season.
Use pantyhose
That’s right. You can lessen the damage after the ice dam has formed with pantyhose! Fill the leg of a spare pair of pantyhose with a calcium chloride ice melter. Lay the pantyhose onto the roof so it crosses the ice dam and overhangs the gutter.
If necessary, use a long-handled garden rake or hoe to push it into position. The calcium chloride will ultimately get through the snow and ice and produce a channel for the water to flow off the roof or down into the gutters.
Hire a professional
When ice dam buildup is simply too much for you to handle, the solution is to call in a firm focused on this service. A number of roofing contractors provide this service during the winter when there is negligible roofing work to do. Professionals are insured and will remove your ice dam employing specialized equipment such as a high-temperature/low-pressure steamer to melt the snow and ice from your roof. True, this service may cost a few hundred dollars, but it can prevent major damage down the road.
How not to remove ice dams?
There are any number of faulty methods to remove ice from your roof that will damage your asphalt shingles, compromise your roof’s water-shedding ability and even endanger your well-being.
To begin, it is NEVER a good idea to take a pick, shovel or other tool to the ice and chip it off. This may very well remove the ice, but might end up breaking the shingles, too. Plus, the next ice dam in this spot is apt to take advantage of the cracks that have been created. As the snow melts, the water may well settle into these cracks, freeze and expand. This type of damage often leads to a leak.
You also need to steer clear of using any chemicals on your roof. Yes, many ice-melt products combine salt and other chemicals that make the salt more effective. Unfortunately, a number of these chemicals can have an adverse effect on asphalt shingles, particularly if the chemicals remain on the roof for extended periods. Plus, their use might just void the shingle manufacturer’s limited warranty.
WARNING: Most importantly, however, you should never climb up on your roof and attempt any such risky ice-removal methods. If need be, you should call a professional roofer to help solve the problem.
How to prevent ice dams before they happen?
Adequate ventilation
Houses with reliable attic ventilation usually aren’t subject to ice dams, and the physics behind this is quite simple. By distributing cool outside air in the attic space (or in the rafter spaces just below the roof deck), the roof surface stays below freezing and can’t melt the snow on the roof. Although it’s the opposite to what many people think, a cold attic really suggests no ice dams, while a warm attic means “homeowner beware.”
Good insulation
In addition to enhancing attic ventilation, the next best approach to lower temperatures against the roof deck is to insulate the ceiling in living spaces below the attic or against the inside surface of your roof. If you have an open attic, this entails insulating the floor of the attic. If you have a finished second-story wherein a finished ceiling is right against the roof, this implies insulating the rafter spaces (in combination with ventilation baffles). These methods of insulating will stop heat from rising up to the roof deck and heating it to the point where it will melt snow lying on the roof.
Sealing air channels from living spaces below the attic is also essential. Gaps around your plumbing pipes and chimneys can be a substantial source of heat flow into the attic from the spaces below. Seal these gaps as part of the overall insulation strategy.
The advantage of an all-inclusive insulation strategy is that it not only helps prevent ice dams, but it also cuts energy costs. But a word of caution. Insulation alone seldom is enough to prevent all ice dams. It should be done in combination with better ventilation.
Eliminate attic heat sources
It’s also quite possible that you have heat sources in your attic that you’re unmindful of. Usually this occurs when outmoded recessed lights reach up into the floor of the attic. These can emit an unanticipated amount of heat into the attic – plenty to heat up the air well above the freezing point, particularly where ventilation is poor. Replacing these old light fixtures with current recessed lights that can be totally insulated will help cut the amount of heat released into your attic.
Other likely sources of heat consist of uninsulated HVAC ductwork, vents from clothes dryers, or incorrectly vented bathroom or kitchen exhaust fans. All these heat sources can be wrapped in fiberglass insulation to lessen the thermal transfer of heat into the attic space.
Use heated cables
Heat cables are high-resistance wires that you mount atop the roof edge in a zigzag configuration and plugged into an outdoor GFCI receptacle. They’re perfect in spots where ice dams frequently occur and can’t be prevented any other way. One problem: You need to channel the meltwater away, otherwise it will re-freeze in the gutters along the roof edge. You’ll have to run the heat cable inside a downspout, so the downspout doesn’t clog with ice.
Hopefully, you have a better understanding of the what, why, how and prevention of ice dams. Should you have any questions, don’t hesitate to contact the professionals at Schultheis Brothers for more information.